On this page
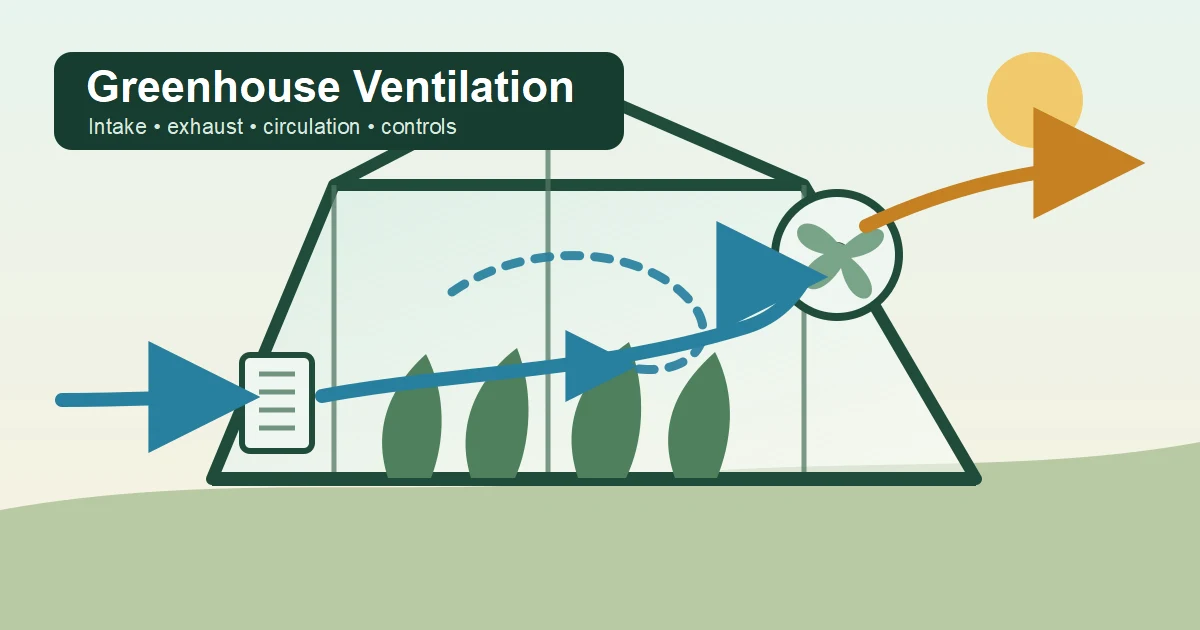
Effective greenhouse ventilation needs more than an open door or a fan. A complete system has five working parts: an outlet for hot, moist air; enough intake area for replacement air; a clear path across the greenhouse; internal circulation; and controls that respond to representative conditions. If one part is weak, the whole system can underperform. Use the greenhouse temperature control guide when the next task is coordinating measurement, solar-load reduction, air exchange, mixing, and heating across seasons.
Use passive vents when the structure and local conditions can provide reliable natural airflow. Use powered exhaust when you need more predictable air exchange. In many small greenhouses, the practical answer is a combined system: vents or fans for air exchange, plus circulation fans for even conditions around the plants.
What greenhouse ventilation must accomplish
Ventilation replaces greenhouse air with outdoor air. That exchange can remove accumulated heat and moisture while replenishing carbon dioxide used in photosynthesis. It also helps prevent the roof space and plant canopy from becoming separate climate zones.
Internal circulation performs a different job. It keeps air moving within the structure, reducing stagnant pockets and large temperature or humidity differences. A circulation fan can improve uniformity, but it does not remove heat or water vapor unless outside-air exchange is also occurring. UMass Extension’s horizontal airflow guidance treats this continuous mixing as distinct from ventilation. Use the circulation fan versus exhaust fan guide when the missing job is unclear, or continue to the greenhouse air circulation guide for internal-path diagnosis.
This distinction matters because each symptom points to a different system failure. If several parts may be involved, use the greenhouse ventilation troubleshooting guide to trace the call, opening, path, delivery clue, and load limit before replacing equipment.
- High daytime temperature: Increase effective air exchange, reduce solar load, or add an appropriate cooling method.
- Condensation and high humidity: Remove moisture when outdoor conditions allow, avoid cold stagnant surfaces, and improve air mixing.
- Hot and cool pockets: Improve the internal air path and circulation pattern.
- Weak exhaust airflow: Check intake restriction, screens, shutters, obstructions, and actual fan performance before assuming the fan is too small.
Important limit: Ventilation alone cannot cool a greenhouse below the outdoor air temperature. It can move indoor temperature toward outdoor conditions by removing solar-heated air. Further cooling requires another process, such as evaporation where the climate supports it, or mechanical cooling. UF/IFAS Extension describes ventilation and cooling as related but separate design problems.
Passive, mechanical, and combined ventilation
| System | How air moves | Best fit | Main limitation |
|---|---|---|---|
| Passive ventilation | Wind and buoyancy move air through roof, ridge, sidewall, or end-wall openings. | Structures with generous, well-positioned openings and favorable exposure. | Airflow changes with wind, temperature difference, obstructions, and vent geometry. |
| Mechanical exhaust | Exhaust fans pull air out while replacement air enters through planned inlets. | Greenhouses needing more predictable warm-weather air exchange. | Performance falls when intake area, shutters, screens, or maintenance restrict flow. |
| Combined system | Passive openings handle suitable conditions; fans provide backup or higher exchange. | Small greenhouses facing changing seasons and weather. | Controls and openings must avoid making the passive and powered paths fight each other. |
| Internal circulation | Fans mix air within the greenhouse. | Nearly every occupied greenhouse, especially during closed or low-ventilation periods. | Does not replace outside-air exchange. |
How passive ventilation works
Warm air becomes less dense and rises toward high openings. Cooler replacement air can enter through lower openings. Wind can strengthen or weaken that movement depending on vent position, building orientation, nearby trees or structures, and whether air has an unobstructed route through the greenhouse.
That is why “open some vents” is not a complete design rule. Effective natural ventilation depends on usable opening area, vertical separation between low and high vents, local wind, insect screening, and greenhouse geometry. UMass Extension explains the roles of both wind and buoyancy in natural greenhouse ventilation.
How powered exhaust works
An exhaust fan creates a pressure difference that pulls replacement air through inlets. For the system to work, air must enter without excessive resistance, travel through the occupied growing area, and reach the fan without an easy shortcut. When those system conditions are defined, use the greenhouse exhaust fan shortlist to compare exact documented models.
A large fan paired with small or obstructed inlets may move much less air than its headline rating suggests. Fan performance should be evaluated at the resistance the complete system creates, not by blade diameter or free-air rating alone. Louvers, shutters, screens, pads, ductwork, and dirty components can all add resistance. Farm Energy’s greenhouse ventilation guidance emphasizes accounting for restrictions in the airflow system.
The five parts of a complete ventilation system
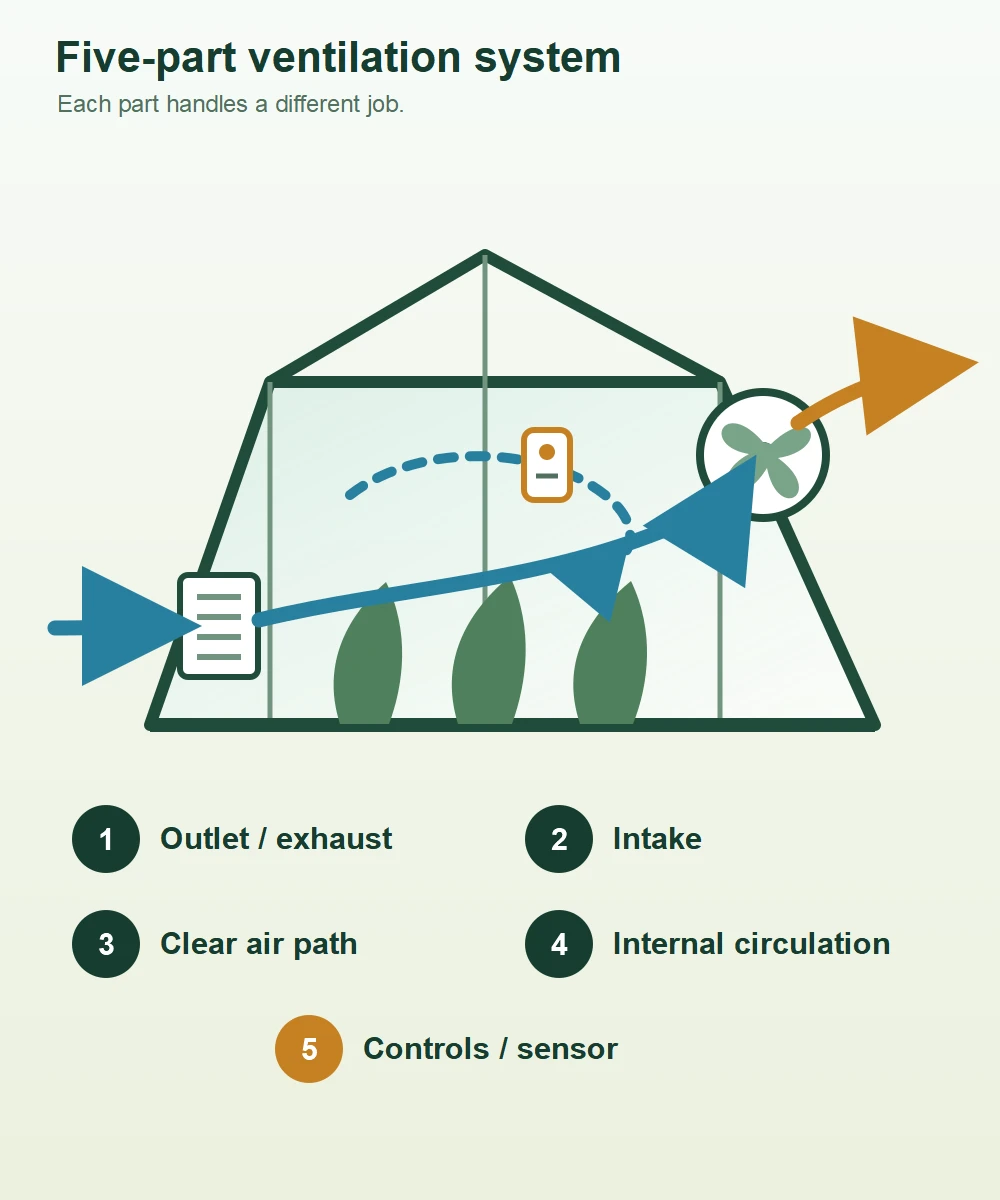
1. A usable outlet
Air needs a deliberate place to leave. In a passive system, this may be a ridge vent, roof vent, or high side opening. In a powered system, it is usually an exhaust fan with a shutter or louver.
High outlets take advantage of rising warm air, but placement must also support a full-house air path. An outlet that pulls mostly from a nearby open door can leave the opposite end hot and stagnant.
2. Adequate replacement-air intake
Every cubic foot of air exhausted must be replaced. Intake can come through sidewall vents, end-wall shutters, roll-up sides, doors used as managed openings, or another designed inlet. The important measure is usable free area after screens, louvers, and framing—not the outside dimensions of the vent.
Too little intake area increases resistance and can produce strong drafts near the opening while distant sections receive weak exchange. It can also make shutters difficult to open fully. Exact intake sizing belongs in a system calculation using fan airflow and component resistance.
3. A clear path through the growing area
Good ventilation is not merely air entering and leaving; it is air passing through the zone where heat and moisture accumulate. Dense foliage, tall shelving, stored materials, interior partitions, and badly aligned openings can divide a small greenhouse into separate airflow zones.
Stand inside with the system operating and inspect the whole path from inlet to outlet. Lightweight survey tape can reveal direction at several locations, but it does not measure delivered CFM. Treat it as a diagnostic clue, not proof that the system is correctly sized.
4. Internal air circulation
Circulation fans should create a gentle, connected movement pattern around the greenhouse rather than a harsh jet aimed at one bench. The goal is to reduce dead zones and keep temperature and humidity more uniform around the canopy.
When outside-air exchange is low—such as a cold night with vents mostly closed—internal circulation becomes especially important. It can reduce localized cold, humid pockets, but it does not remove moisture from the structure by itself.
5. Controls and representative sensing
Thermostats, humidistats, staged controllers, and automatic vent openers determine when equipment operates. A sensor in direct sun, against an exterior wall, above the crop zone, or in the direct discharge of a heater or fan may not represent plant conditions.
Place controls according to their manufacturer instructions and shield sensors from influences that create a false reading. Check actual greenhouse conditions with an independent instrument before trusting a control setting. A correct setpoint cannot compensate for a badly located sensor.
How to assess your greenhouse ventilation
Work through the system in order. This prevents an equipment purchase from masking a simpler restriction.
- Define the problem and time. Record whether the issue is midday heat, overnight condensation, uneven canopy conditions, or persistent stagnant air. Note outdoor temperature and humidity at the same time.
- Inventory every opening and fan. Record vent type, clear opening dimensions, screen condition, fan model, shutter operation, and control method.
- Calculate greenhouse volume. For a simple shape, multiply interior length by width by average height. Use cubic feet consistently. Segment unusual roof shapes rather than pretending the structure is a perfect box.
- Trace the air path. Identify where replacement air enters, which crop zones it crosses, and where it exits. Look for shortcuts between a nearby inlet and exhaust.
- Check restrictions. Clean dirty screens, louvers, shutters, and fan guards. Confirm shutters open fully and plants or stored items do not block openings.
- Separate exchange from mixing. Confirm that outside air is moving through the greenhouse and that internal circulation reaches dead zones.
- Review control behavior. Compare controller readings with an independent sensor at crop height. Observe whether stages operate in the intended sequence.
- Only then calculate changes. Use greenhouse volume, climate conditions, delivered fan performance, intake free area, and system resistance for detailed sizing.
A useful diagnostic metric is air changes per hour:
Air changes per hour = delivered CFM × 60 ÷ greenhouse volume in cubic feet
This formula describes the exchange produced by a known delivered airflow. It does not tell you the correct target by itself. Appropriate rates depend on season, climate, structure, crop, solar load, and the purpose of ventilation. Use tested fan data at expected resistance, not only the largest number printed on a product page.
Operate the system differently by season
Warm and sunny conditions
Solar gain can raise greenhouse temperature quickly even when outdoor air feels comfortable. Open passive vents early enough to prevent a large heat buildup, or stage exhaust equipment before the greenhouse overshoots its acceptable range. Shade and evaporative cooling may be needed when ventilation cannot keep conditions close enough to outdoor temperature.
Cool weather and overnight periods
Closing every opening conserves heat but can trap moisture. A cold surface may then reach the dew point, producing condensation even when average relative humidity does not appear extreme. Use controlled ventilation when outdoor conditions allow moisture removal, and keep internal air moving to reduce cold stagnant pockets. Use the greenhouse humidity control guide to diagnose moisture sources, temperature effects, outdoor-air usefulness, and the next bounded action.
Ventilation and heating may need to operate together for short periods: heating raises the air’s moisture-holding capacity, and a measured air exchange removes part of that moisture. The correct strategy depends on outdoor humidity, energy cost, crop tolerance, and the greenhouse envelope.
Windy conditions
Wind can greatly change natural ventilation and pressure around fans and vents. Secure openings, follow hardware wind limits, and do not assume an automatic opener can protect a vent during severe weather. Close or lock components when their manufacturer instructions require it.
Common greenhouse ventilation failures
| Symptom | Likely system issue | What to check first |
|---|---|---|
| Fan sounds strong but airflow feels weak | Restricted intake, dirty screen, partly closed shutter, or fan operating against higher resistance than expected | Usable inlet area, screen cleanliness, shutter travel, and fan performance data |
| One end stays much hotter | Air shortcut, blocked path, or weak internal mixing | Inlet-to-outlet path, shelving, foliage density, and circulation pattern |
| Condensation forms overnight | Moisture trapped during closed operation or cold stagnant surfaces | Outdoor humidity, controlled exchange opportunity, heat distribution, and circulation |
| Plants near inlet are stressed while center stays hot | Intake air enters as a concentrated jet instead of spreading through the space | Inlet placement, opening distribution, baffles, and obstruction pattern |
| Controller cycles equipment at the wrong time | Sensor exposed to direct sun, wall temperature, heater discharge, or fan draft | Sensor location, shielding, calibration comparison, and control staging |
| Greenhouse remains far above outdoor temperature | Insufficient effective exchange, high solar load, or both | Delivered airflow, vent openings, restrictions, shade, and whether added cooling is needed |
Safety and installation boundaries
Greenhouses combine moisture, irrigation, heat, moving fan blades, lightweight structures, and sometimes temporary wiring. Use fans, controls, receptacles, cords, and enclosures suitable for the location and follow the exact equipment instructions. Electrical work may require a qualified electrician and must comply with applicable code.
Do not cut framing, glazing, or structural bracing merely to create a larger opening without confirming how the modification affects wind and snow resistance. Guard accessible moving parts, maintain required equipment clearances, and provide a safe way to disconnect power before cleaning or service.
A practical ventilation planning checklist
- Record interior length, width, average height, and structure shape.
- Define the temperature, humidity, or uniformity problem by season and time of day.
- List all usable inlets, outlets, fans, screens, shutters, and controls.
- Confirm air can cross the growing area instead of taking a shortcut.
- Separate outside-air exchange equipment from internal circulation equipment.
- Clean and test existing components before increasing capacity.
- Use delivered fan performance and usable vent free area in later calculations.
- Check sensor location and compare its reading with an independent instrument.
- Plan for warm-weather heat removal and cool-weather moisture control.
- Keep electrical and structural changes within manufacturer instructions and applicable code.
The best greenhouse ventilation system is not automatically the one with the largest fan or the most vents. It is the system whose outlet, intake, air path, circulation, and controls work together under the conditions your greenhouse actually experiences. Start by finding the weakest of those five parts; detailed sizing becomes much more useful after that system check.